> For the complete documentation index, see [llms.txt](https://docs.gapvelocity.ai/webmap/llms.txt). Markdown versions of documentation pages are available by appending `.md` to page URLs; this page is available as [Markdown](https://docs.gapvelocity.ai/webmap/winforms/extend-or-modify-the-converted-application/nowebmap-forms-winforms/adding-the-created-form-to-the-migrated-app.md).

# Adding the created form to the migrated App

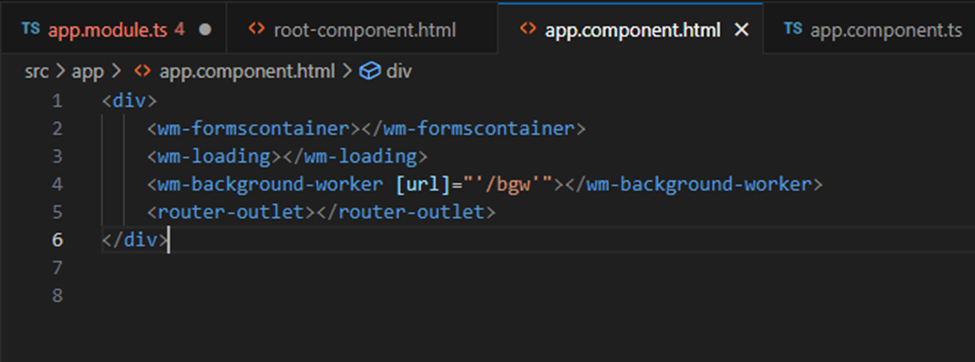
As you can see previously, it’s a very simple component. Now is necessary to add the component to the application to render it. And here, the Angular Router is very useful. On the app.component.html, we are going to add a router outlet

<figure><img src="/files/jFFyjWDEnw8lCdPYQxnF" alt=""><figcaption><p>Manual change on the app.component.html of the migrated application</p></figcaption></figure>

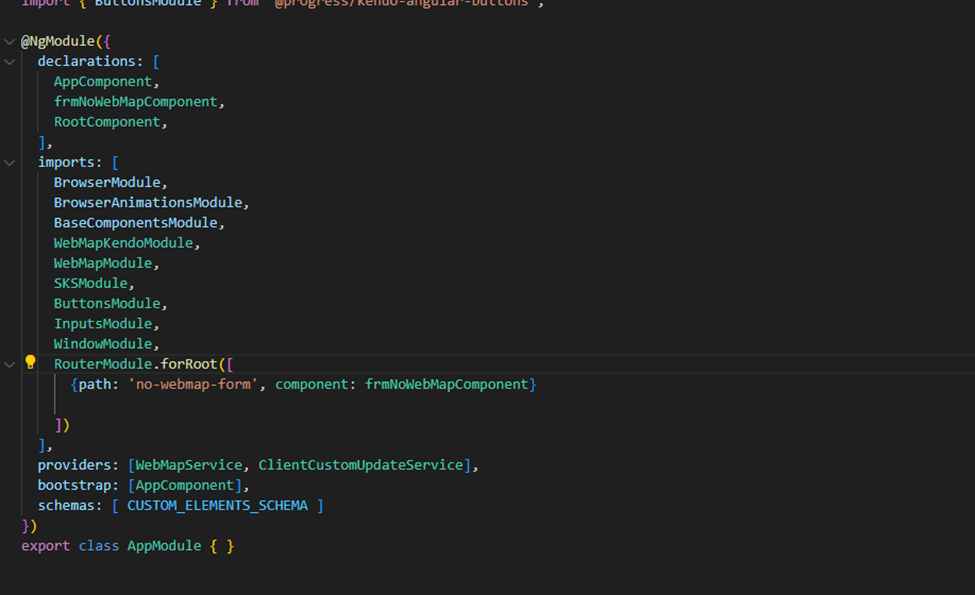
Now in the AppModule, we are going to add the Routes and the created component

<figure><img src="/files/xTYzgrWRhUqAvFPHIz8s" alt=""><figcaption><p>Modify the AppModule to use the Angular Routing and add a route for the new component</p></figcaption></figure>

From here, we need to display the frmNoWebMapComponent using the routing.

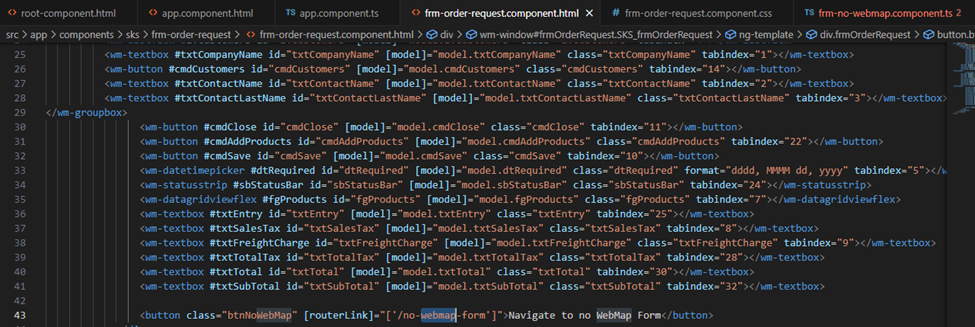
Then we are going to add button to redirect to the route of the Form. This routing mechanism can be added from any existing migrated component.

<figure><img src="/files/wEvnKgrD9jp7BlRkl7qV" alt=""><figcaption><p>Adding a button to route to the added component</p></figcaption></figure>

And with this, at clicking at the button, the frmNoWebMapComponent will be displayed.